

TL;DR:
- Effective tryouts rely on a clear rubric, structured rotations, and real-time scoring to ensure fairness and consistency.
- Communication and calibration among evaluators are essential to making objective decisions and delivering cuts respectfully.
The most effective tryouts combine a pre-defined rubric, structured rotations that give every player multiple game-like looks, and real-time scoring — all wrapped in clear communication before and after the session.
TL;DR:
- Define your scoring scale and share it with every evaluator before anyone walks through the door.
- Run structured rotations so every player faces different teammates and gets equal reps.
- Record scores immediately. Memory after a long session is unreliable.
- Communicate decisions within 48–72 hours and pair every cut with a concrete development note.
Sample 90-minute timeline: 10’ check-in and warm-up → 30’ skills stations → 40’ small-sided games → 10’ wrap-up and notes.
A ready-to-use Basketball Player Evaluation Form is available in the promo section below.
Table of Contents
- What does it take to run effective tryouts?
- What should you prepare before tryout day?
- What does a tryout schedule actually look like?
- Which drills reveal the most in the least time?
- How do you build a scoring rubric that holds up?
- How do you keep the session running smoothly?
- What should you prioritize by age and level?
- What mistakes do coaches make most often during tryouts?
- How do you deliver cuts with dignity?
- How do you manage player behavior and motivation during tryouts?
- Key Takeaways
- The part most coaches skip
- Ready-to-use tools from Hoop Mentality
- Useful sources
- FAQ
What does it take to run effective tryouts?
Effective tryouts don’t happen by accident. They require decisions made days before the first player arrives: how many spots are available, what you’re scoring, and who is doing the scoring.
A pre-defined rubric focused on fundamentals for younger players and sport-specific skills for older athletes is the foundation. Without it, evaluators drift toward different criteria and post-tryout disputes follow. The fix is simple: write the rubric, share it, and run a short calibration meeting before the session starts.
The sections below walk through every step, from logistics to cut conversations.
What should you prepare before tryout day?
Solid preparation is what separates a session that feels fair from one that generates complaints. Work through this checklist in the week before tryouts.
Roster and criteria:
- Set the number of open spots by position or role before evaluations begin.
- Define your scoring scale. Define a 1–6 scoring scale and share it with every evaluator in writing before evaluations begin. Categorize performance levels as below expectations, meeting expectations, and exceeding expectations.
- Identify the five to seven traits you will score (ball-handling, shooting, defense, effort, coachability, game sense).
Logistics:
- Confirm the facility, date(s), and session length.
- Collect signed waivers and registration forms in advance. Have a first-aid kit on-site and know your venue’s emergency protocol.
- Prepare pinnies or numbered bibs. Assign each player a number at check-in and use that number in all notes.
Staffing:
- Assign each evaluator to a specific station or role (station lead, roving evaluator, data-capture lead, timekeeper, parent liaison).
- Schedule a 10-minute calibration meeting before players arrive. Walk through one or two example scores together so everyone is anchored to the same standard. Evaluator misalignment is the most common failure in tryouts — a brief calibration meeting prevents most of it.
Parent communication:
- Send a pre-tryout email at least five days out. Include what to bring, the session schedule, and the decision timeline.
- Clear communication with parents before tryouts reduces anxiety and prevents post-tryout complaints.
Pro Tip: Assign numbers at check-in and use only those numbers in your notes throughout the session. It reduces name-recognition bias and keeps evaluations cleaner.
What does a tryout schedule actually look like?
Youth tryouts between 90 minutes and two hours give you enough time to see every player in multiple contexts without running into fatigue. Below are three templates you can copy directly.
Time-block templates
| Block | 90-Minute Session | 120-Minute Session | 90–120 Min (U10 and under) |
|---|---|---|---|
| Check-in / warm-up | 10 min | 15 min | 10 min |
| Skills stations | 30 min | 30 min | 40 min |
| Transition drills | 10 min | 10 min | 10 min |
| Small-sided games | 30 min | — | — |
| Wrap-up / notes | 10 min | 15 min | 10 min |
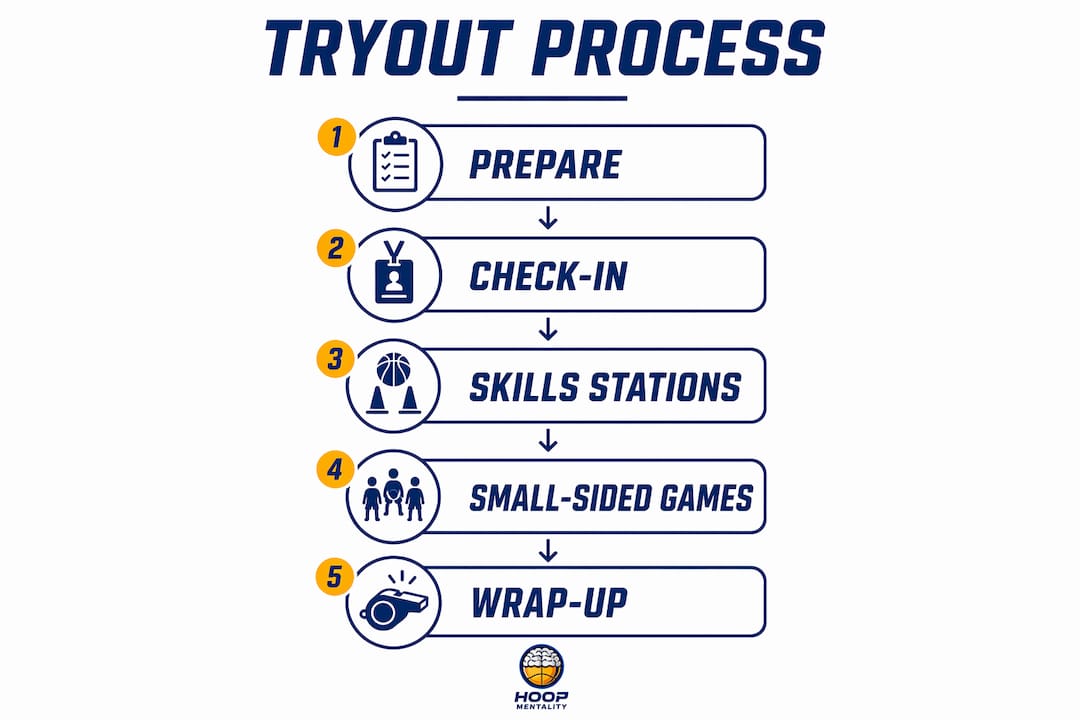
Multi-session option: Two sessions spaced two to three days apart let you see players when they’re fresh and when they’re tired. The first session focuses on individual skills; the second on team play and decision-making. The trade-off is scheduling complexity and a longer wait for families.
A few practical notes:
- Budget 10–15 minutes for check-in and paperwork before the official start time. Don’t eat into evaluation time with administrative delays.
- For older competitive players (high school, club), 120+ minutes is appropriate. Add a second scrimmage rotation or a conditioning segment.
- Keep station transitions under two minutes. Pre-set equipment at every station before players arrive.
Which drills reveal the most in the least time?
Small-sided games reveal decision-making, scanning, and teamwork better than isolated drills. Build the tryout around 3v3 and 4v4 play, and use drills to confirm specific technical questions.
Warm-up (what to observe):
- Stationary ball work and partner passing: watch hand coordination, footwork, and how players respond to a missed catch or bad pass. Effort and body language show up immediately.
Station examples:
- Dribble/drive: Score ball security under pressure and the ability to finish at the rim. Look for two-hand control and balance, not just speed.
- Shooting under pressure: Catch-and-shoot off a pass with a closeout coming. Score mechanics and composure, not just makes and misses.
- Defensive closeout: Score foot speed, stance, and whether the player contests without fouling. Defensive effort is one of the clearest coachability signals you’ll see.
Small-sided games (3v3, 4v4): These are your primary evaluation tool. Rotate teammates every two to three possessions so you see players with different partners. Score spacing decisions, off-ball movement, and how players communicate on defense.
Transition scrimmages: Run a short transition drill (outlet pass to push) before full scrimmage. It isolates conditioning and decision speed in one activity.
Pro Tip: Try a constrained game: 2-touch offense only. It forces quick decisions and immediately separates players who read the game from those who rely on athleticism alone.
How do you build a scoring rubric that holds up?
A consistent rubric makes selection defensible. Use a 1–6 scale: odd numbers force evaluators off the fence and the six-point spread gives you enough resolution to separate players without false precision.
Sample scoring table
| Trait | Weight (Youth) | Weight (Competitive) | What a “4” looks like |
|---|---|---|---|
| Ball-handling / fundamentals | — | — | Solid control under light pressure |
| Shooting mechanics | — | — | Consistent form, average conversion |
| Defense / effort | — | — | Active stance, contests most shots |
| Game sense / decision-making | 15% | — | Reads basic situations correctly |
| Coachability / attitude | — | 15% | Responds to feedback without resistance |
How to combine scores: Average each evaluator’s station scores into a composite. For two evaluators, a simple average works. For three or more, drop the highest and lowest score on any single trait before averaging — it reduces outlier influence. Map the composite to a three-tier decision grid:
- Invite: composite 4.5 and above
- Hold: composite 3.0–4.4 (needs a second look or a roster spot opens)
- Cut: composite below 3.0
For a ready-made layout, the Basketball Player Evaluation Form from Hoop Mentality captures station scores, evaluator notes, and composite totals in one printable sheet.
A shared spreadsheet (Google Sheets works well) with one tab per evaluator and a summary tab that auto-averages scores lets you see the full picture in real time. Apps like HomeTown Ticketing or sport-specific platforms can handle digital capture if your organization prefers it.
How do you keep the session running smoothly?
Operations matter as much as evaluation design. A session that runs late or creates uneven reps undermines the data you collect.
Group sizes:
- U10 and under: groups of four to six. Smaller groups mean more reps and less standing around.
- U11–U14: groups of six to eight.
- High school and club: groups of eight to ten, with deliberate rotation to mix teammates.
Rotation patterns: Fix the stations, not the groups. Rotate players through stations on a timer so no player is stuck with the same teammates for the entire session. This prevents one strong group from masking weaker players and one weak group from dragging down a strong one.
Evaluator roles:
- Station lead: runs the drill and scores players at that station.
- Roving evaluator: moves through all stations, catches players the station lead may have missed, and flags standouts or concerns.
- Data-capture lead: collects score sheets after each rotation and enters them into the master spreadsheet.
- Timekeeper: calls transitions and keeps the session on schedule.
- Parent liaison: manages the waiting area, answers questions, and keeps parents away from the evaluation floor.
Capturing observations in real time prevents the memory fade and conflicting recollections that derail post-tryout staff meetings. Paper grids on clipboards work. A shared Google Sheet on a tablet works better.
Pro Tip: Pre-number your score sheets to match player bibs. At each station transition, the data-capture lead collects the completed sheet and hands the evaluator a fresh one. No shuffling, no lost notes.
What should you prioritize by age and level?
The same five traits appear on every rubric. What changes is how much weight each one carries.
Ages 6–10 (foundational):
- Prioritize coordination, effort, and coachability above everything else. A player who listens and tries hard at this age is more valuable than one with raw athleticism who tunes out instruction.
- Score: basic ball control, catching, following directions, and positive interaction with peers.
- A “5” at this level means the player does what’s asked, stays engaged, and shows basic motor control. A “2” means repeated inattention or inability to follow simple instructions.
Ages 11–14 (developmental):
- Add sport-specific skills and basic decision-making to the rubric. Conditioning becomes a factor but should not outweigh skill.
- Score: dribble/drive execution, catch-and-shoot mechanics, defensive positioning, and whether the player makes the simple play under pressure.
- Use the player evaluation guide to calibrate what “age-appropriate” looks like at this stage.
High school and club (competitive):
- Game sense, positional fit, endurance, and role-specific skills move to the top of the weighting. Coachability stays, but the bar is higher: you’re looking for players who self-correct, not just players who respond to feedback.
- Score: spacing decisions, off-ball movement, conditioning under fatigue (late in scrimmage), and whether the player fits the specific role you need filled.
Adjust the weights in the scoring table, not the categories. Keeping the same five traits across all ages makes year-over-year comparisons possible and keeps your staff aligned.
What mistakes do coaches make most often during tryouts?
Most tryout problems trace back to a handful of repeatable errors. Here are the most common ones and the fix for each.
-
Anchoring on first impressions. Players settle in after the first 10–15 minutes. A player who looks shaky in the warm-up may be the best decision-maker in the scrimmage. Fix: structure the session to capture multiple looks across the full session, and default any player you haven’t seen enough of to “Hold,” not “Cut.”
-
No shared rubric among evaluators. When evaluators score on different mental scales, the composite is meaningless. Fix: run the 10-minute calibration meeting and put the scoring guide in writing.
-
Uneven exposure from fixed rotations. If the same players always compete together, you can’t separate individual performance from team chemistry. Fix: deliberately mix teammates every rotation and set a fixed rep count per station.
-
Relying on memory. After evaluating 30–40 players across two hours, memory is not reliable. Fix: assign a data-capture lead and use structured forms. Every score goes on paper or into a spreadsheet before the next rotation starts.
-
Poor post-tryout communication. Families who wait a week for a decision, or receive a vague “we’ll be in touch,” lose trust in the program. Fix: set a clear decision timeline in the pre-tryout email and stick to it.
How do you deliver cuts with dignity?
The way a player is cut affects the family’s long-term relationship with the program. A vague “it wasn’t the right fit” is not a development conversation. A specific, kind message with a next step is.
Principles:
- Be specific. Name one or two concrete areas to work on, not a general “keep improving.”
- Be kind. The player put themselves out there. Acknowledge that.
- Give a next step. A drill, a clinic, a developmental team, or a private lesson referral turns a “no” into a plan.
Sample scripts:
Invite (text or email): “Hi [Name], we’re excited to offer you a spot on the team. Practice starts [date]. Reply to confirm.”
Cut (phone call preferred): “Thanks for coming out. You showed [specific positive]. The area to focus on before next season is [specific skill]. Here’s what I’d recommend working on: [concrete suggestion]. We’d love to see you back.”
Hold (text or email): “We’re still finalizing the roster and want to see you one more time. We’ll have a decision by [specific date].”
Objective data from your evaluation form — a conditioning score, a shooting percentage from the station, a defensive rating — gives the cut conversation a concrete anchor. It converts a subjective decision into a measurable development roadmap.
Communicate decisions within 48–72 hours of the final session. For holds, set a hard deadline and honor it. Families plan around these decisions.
For players who don’t make the roster, offer alternatives: a developmental team, an open gym, a skills clinic, or a referral to offseason improvement drills they can work through on their own.
How do you manage player behavior and motivation during tryouts?
Tryouts are high-pressure for players. How you manage the environment directly affects the quality of the data you collect.
Greeting every player by name and using positive reinforcement measurably improves performance and long-term participation. A player who feels seen performs closer to their actual ability. One who feels invisible or judged tightens up.
Set behavioral expectations at the start of the session, in front of everyone. Cover three things: how to transition between stations, what to do when waiting, and how to respond to feedback. Keep it short. Players who know what’s expected spend less energy on anxiety and more on performing.
For players who act out or disengage, address it quietly and directly. Pull the player aside, reset the expectation, and move on. Public corrections during tryouts create an audience and usually make the behavior worse. The youth coaching guide from Hoop Mentality covers this in more detail.
Motivation tends to drop in the middle of a long session. Keep energy up with short, specific encouragement (“good read,” “nice closeout”) rather than generic praise. Players respond to feedback that shows you’re actually watching.
Key Takeaways
Running effective tryouts requires a pre-defined rubric, calibrated evaluators, structured rotations, real-time scoring, and prompt communication — every step depends on the one before it.
| Point | Details |
|---|---|
| Build the rubric first | Define a 1–6 scoring scale and share it with every evaluator before the session starts. |
| Calibrate your staff | A 10-minute pre-session meeting anchors scoring and prevents post-tryout disputes. |
| Give multiple looks | Structure rotations so every player is seen in different contexts across the full session. |
| Record in real time | Assign a data-capture lead; memory after 30–40 evaluations is not reliable. |
| Hoop Mentality templates | The Basketball Player Evaluation Form captures station scores and composites in one ready-to-use sheet. |
The part most coaches skip
Most tryout guides focus on drills and schedules. The harder problem is the one that happens before anyone dribbles: getting your evaluators to see the same thing.
Coaches often assume that because they’ve worked together for years, they share the same mental model of what a “4” looks like on defense. They usually don’t. One evaluator scores effort; another scores technique. One rewards aggression; another penalizes fouls. The composite score that comes out of that session is a blend of different standards, not a reliable picture of the player.
The calibration meeting is the fix, but it only works if you actually score a few hypothetical players together out loud and compare. Not just “does everyone understand the rubric?” but “I’d give that a 3 — what would you give it?” That conversation, done in 10 minutes before tryouts start, is worth more than any drill you run.
The other thing worth saying: development versus immediate competitiveness is a real trade-off, and pretending it isn’t does a disservice to the players you cut. Sometimes the right call for the team is not the right call for a 12-year-old who just needs another year. Hoop Mentality’s templates are built to make that decision transparent — the scores are there, the notes are there, and the feedback conversation has something to stand on. That’s the point.
Ready-to-use tools from Hoop Mentality
Hoop Mentality has the resources to put this guide to work immediately. The Basketball Player Evaluation Form is a downloadable, printable sheet built to capture station scores, evaluator notes, and composite totals during a live session — no setup required, just print and go.
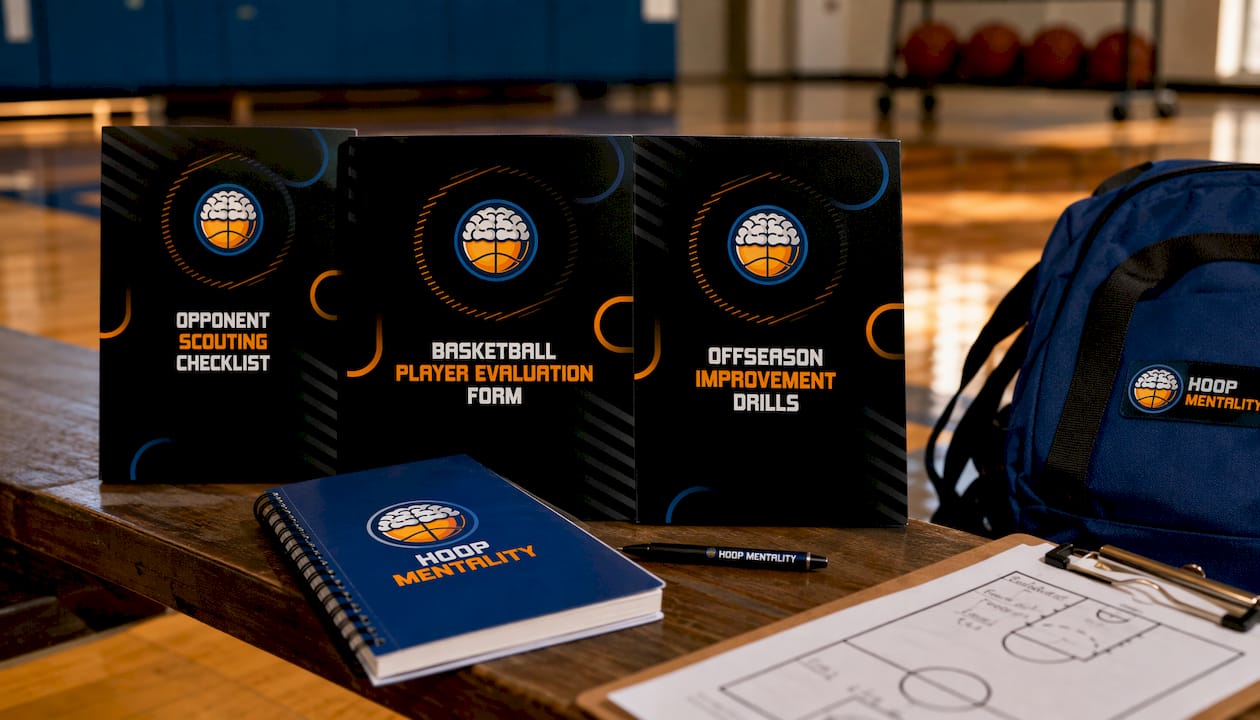
The Opponent Scouting Checklist gives you a structured template for tracking player tendencies and lineup decisions beyond tryout day. Both resources are authored by Hoop Mentality coaches and field-tested in real sessions. Download the evaluation form, assign your player numbers, and you’re ready to run a session that produces defensible, documented results.
Useful sources
- Best Practices for Running Player Tryouts: Youth Sports Organization — Positive Coaching Alliance guidelines on rubric design, equal treatment, and station structure.
- 7 Essential Tips to Run a Successful Youth Sports Tryout — Covers session length, positive reinforcement, and parent communication best practices.
- How to Run a Youth Soccer Tryout That Actually Evaluates Players — Strong framework for evaluator alignment, real-time recording, and small-sided game prioritization.
- The Ultimate Playbook for Youth Sports Tryouts — Covers anchoring bias, cut delivery, and community goodwill.
- Youth Tryout Evaluation Guide — Explains how objective fitness data supports constructive cut conversations.
- How to Prepare for Youth Sports Tryouts — Parent communication strategies and pre-tryout preparation tips.
- Making the Cut: Tryout Preparation, Analysis and Execution — Junior Volleyball Association’s detailed two-session structure and data-capture workflow.
- Basketball Player Evaluation Form — Hoop Mentality’s ready-to-use scoring sheet for live tryout capture.
- Basketball Evaluation Criteria for Coaches — Hoop Mentality’s guide to building consistent evaluation criteria.
FAQ
How long should a basketball tryout be?
Between 90 minutes and two hours is the recommended range for youth tryouts. Shorter sessions risk missing key observations; longer ones introduce fatigue that distorts performance.
What do coaches look for during tryouts?
Coaches score fundamentals, effort, coachability, game sense, and positional skills. For younger players, coachability and effort carry the most weight; for competitive players, game sense and role-specific skills move to the top.
What are the most common mistakes to avoid during tryouts?
Anchoring on first impressions, skipping evaluator calibration, and relying on memory instead of real-time notes are the three most damaging errors. Each has a direct fix: multiple looks, a pre-session calibration meeting, and a designated data-capture lead.
How do you run effective basketball tryouts fairly?
Assign each player a number at check-in, use a shared 1–6 scoring scale, rotate teammates deliberately, and have every evaluator score independently before comparing notes. Fairness comes from process, not intention.
How do you deliver a cut respectfully?
Call the player (or parent, for younger athletes) within 48–72 hours, name one specific positive, identify one concrete area to improve, and offer a next step — a drill, a clinic, or a developmental team option.