

TL;DR:
- A comprehensive basketball scouting workflow includes preparing, collecting, analyzing, synthesizing, delivering, and following up on opponent data. Using objective questions and tools reduces time spent and improves decision accuracy, with automated tagging cutting preparation time significantly. A one-page scout report with specific risk labels and a timeout script enables quick, focused coaching decisions under pressure.
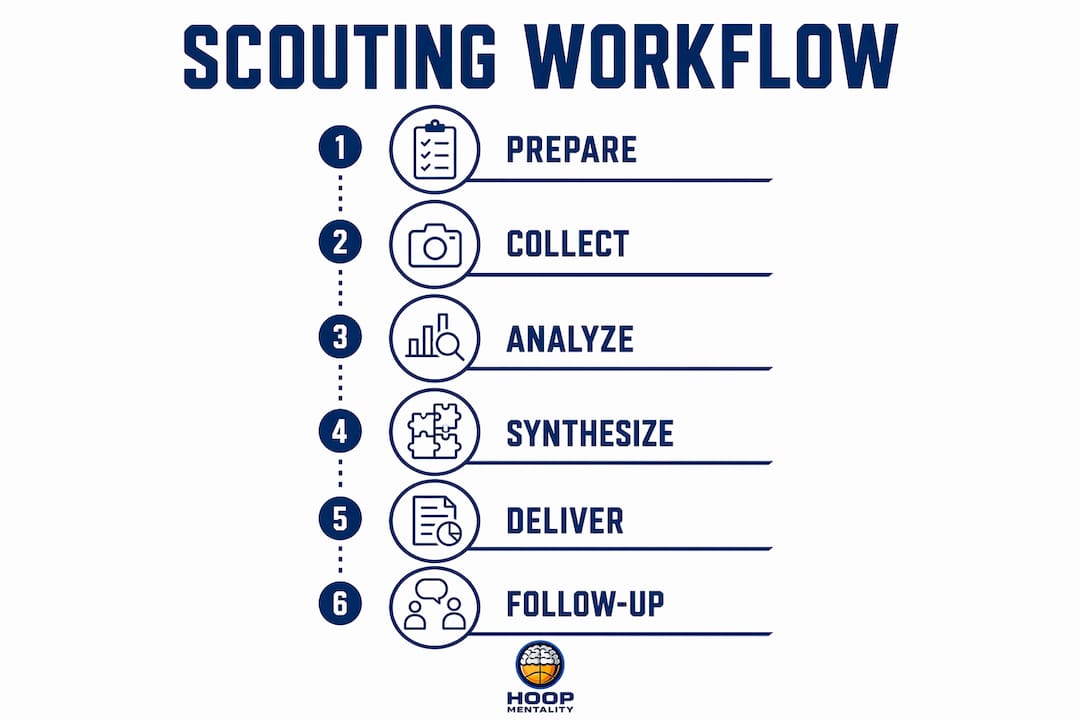
The complete step-by-step scouting workflow runs: prepare → collect/tag → analyze → synthesize → deliver → follow-up. Done right, it produces a one-page scout card, a 3-clip video playlist, and a timeout script — all ready before tip-off. Here is what each step delivers:
- One-page scouting card: 6 fields × 6–8 rotation players
- 3-clip playlist: labeled “exploit,” “stop,” and “close call”
- Risk register entry: confidence level + next-test instruction
- Practice rep list: drill assignments mapped to scouting findings
Time budget per opponent:
- Preparation: 0–15 min
- Collect/tag per player (with tools): 15–25 min; (without tools): 60–90 min
- Analyze per player: 15–25 min
- Synthesize (full card + playlist): 10–20 min
- Deliver (finalize + timeout script): 5–8 min
- Follow-up (risk labels + cross-check): ongoing
Table of Contents
- Why defining objectives before film changes your results
- The step-by-step scouting workflow, with time budgets
- Which tools and templates speed up the workflow
- How to write a timeout-ready scouting report
- How to label uncertainty and avoid overconfidence
- How to turn scouting findings into practice reps
- Simple metrics to verify your scouting calls
- Adoption checklist and next steps
- Key Takeaways
- What coaches get wrong about scouting reports
- Hoop Mentality has the templates to get started now
- Useful sources and tools to explore next
- FAQ
Why defining objectives before film changes your results
Objective-free viewing leads to passive pattern discovery instead of active evidence collection. That is the single biggest scouting mistake coaches make. You watch 40 minutes of film and walk away with a vague impression rather than a decision.

Set your role template and three core questions before you press play. For example: “Does this player create more than 40% of scoring via pick-and-roll?” or “What defensive coverage breaks their primary action?” Those questions shape which possessions you pull, which metrics matter, and which clips go into the playlist.
Objective-first viewing also makes uncertainty visible early. When a clip does not answer your question, you know to flag it as low confidence rather than fold it into a false pattern. That discipline connects directly to better decisions at the scouting checklist stage.
Pro Tip: Write your three scouting questions at the top of your template before opening any film. If you cannot answer them after watching, you need more clips — not a longer report.
The step-by-step scouting workflow, with time budgets
Follow these steps in order. Each one has a clear owner and a time cap.
- Prepare (0–15 min): Pull the opponent roster, assign role templates, identify 2–3 relevant games to review. Head coach or lead assistant owns this.
- Collect/tag (15–25 min per player with tools; 60–90 min without): Pull the last 50 possessions per player. Tag each possession by spot, action, and result. Video analyst or assistant owns this step.
- Analyze (15–25 min per player): Watch the most efficient possessions, then the most-stopped ones. Identify 3–4 repeating efficiency patterns and 2–3 failure modes.
- Synthesize (10–20 min): Write the one-page card (6 fields per player) and build the 3-clip playlist. Assistant or head coach owns this.
- Deliver (5–8 min): Finalize the card, write the one-line coaching output, and draft the timeout script.
- Follow-up (ongoing): Add risk labels, cross-check clips across games, update the decision register.
Single-coach fallback: Combine steps 2 and 3 into one session using a tagging tool. Skip live tagging and use a spreadsheet shot log instead. Prioritize the top 4 rotation players.
| Step | Owner | Time (with tools) | Time (without tools) |
|---|---|---|---|
| Prepare | Head coach | 0–15 min | 0–15 min |
| Collect/tag | Video analyst | 15–25 min/player | 60–90 min/player |
| Analyze | Assistant coach | 15–25 min/player | 15–25 min/player |
| Synthesize | Assistant/HC | 10–20 min | 10–20 min |
| Deliver | Head coach | 5–8 min | 5–8 min |
| Follow-up | All staff | Ongoing | Ongoing |
Pro Tip: Cross-checkers should answer a different question than the primary scout — ask “What would break in our system?” not “Is this player good?” That frame catches confirmation bias before the decision meeting.
Which tools and templates speed up the workflow
Automated tagging cuts per-player manual work from 60–90 minutes down to 15–25 minutes. That gap is where most staffs lose hours each week. The right tool category depends on your budget and staff size.
- Automated tagging platforms: Best for programs with a video analyst. Pre-tag games by action type and pull possession clips by filter.
- Basic video player + manual tag protocol: Spreadsheet shot log with columns for spot, action, result, and confidence. Slower, but free.
- Presentation templates: Google Slides or Notion pages formatted as one-page scout cards. Drop in clip thumbnails and field data.
For the one-page card, use a 6-field structure per player: dominant hand, preferred spots, primary action, defensive matchup, foul rate, and quiet edge. The Basketball Scouting Report Template from Hoop Mentality is pre-formatted for this layout and works in Google Docs or Notion without any setup.
Staffs that pre-tag games and use a one-page template recover hours per opponent each week. The time savings compound across a full season — a staff running 20 opponents saves the equivalent of multiple full prep days compared to raw-film workflows.
For tool categories and descriptions, the basketball scouting tools list covers what to look for at each staff size.
How to write a timeout-ready scouting report
A one-page scouting report must be readable in under 90 seconds. That is the timeout usability test. If your assistant cannot find the key call in 90 seconds under pressure, the report is too long.
Structure each player block with:
- Player header: Name, number, position, dominant hand
- 6 fields: Preferred spots (use court coordinates), primary action, defensive matchup, foul rate, quiet edge, and one coach action line
- Risk flag: Low / Moderate / High confidence, with source noted
For the 3-clip playlist, label each clip by purpose: “exploit” (their weakness vs. your coverage), “stop” (their primary action), and “close call” (one-game observation, low confidence). Keep the playlist under 4 minutes total.
The timeout script is 20 seconds, read verbatim. Format it as: “Watch for [primary action] from [player number]. We run [coverage call]. Key stop: [one sentence].” For detailed report structure guidance, the scouting report essentials guide covers visual rules and font sizing for bench-card use. Designing a concise, scannable layout follows the same principles as reporting dashboards in clubs — one screen, one decision, no scrolling.
How to label uncertainty and avoid overconfidence
Scouting is managing uncertainty — label it as risk and define next-best-tests before raising confidence. A single-game observation is not a pattern. Treat it as a hypothesis.
Use a three-level confidence scale on every observation:
- Low: One clip or one game. Do not act on it without more evidence.
- Moderate: Two independent clips or two games showing the same pattern.
- High: Three or more clips, cross-game, data-backed.
Require at least two independent clips before upgrading from Low to Moderate. Alongside each player field, record the risk type: adaptation risk (new system), role risk (limited sample in this role), or durability risk (injury history). On the one-page card, phrase uncertainty plainly: “Tendency vs. zone — confirmed 2 games, monitor vs. man.” That keeps players and staff aligned without overstating the call.
Pro Tip: Never present a single-game observation as a confirmed tendency in a team meeting. Flag it as “one-game read” on the card and assign a cross-check clip before the next opponent.
How to turn scouting findings into practice reps
Each scouting finding maps to a specific practice objective. That connection is what separates a scout from a game plan.
- Map findings to reps: Guard-side ball-screen tendency → 10 dedicated live reps vs. scout-team action. Weak-side help gap → 5 shell drill reps with the specific coverage call.
- Build a 20–30 minute practice block: Open with the 3-clip playlist as a visual primer (3–4 min). Run the primary coverage call live (10–12 min). Close with a competitive rep sequence (8–10 min).
- Assign scout-team roles: One assistant runs the scout team running the opponent’s primary actions. Rotate scout-team players so everyone understands the opponent’s tendencies.
The skills development workflow shows how to sequence these reps within a weekly practice plan so scouting prep does not crowd out skill work.
Simple metrics to verify your scouting calls
Track a minimal set of metrics per player and per action. After the game, check whether your calls held up.
| Metric | How to calculate | Verification threshold |
|---|---|---|
| Spot FG% | FGM ÷ FGA at tagged spot | Confirmed if ≥ 40% over 2+ games |
| Possessions by action % | Tagged action possessions ÷ total possessions | Confirmed if ≥ 25% of possessions |
| Foul rate | Fouls drawn per 40 possessions | Flag if > 6 fouls drawn per 40 |
| Success rate vs. coverage | Stops ÷ possessions defended with your call | Confirmed if ≥ 55% stop rate |
Review these numbers the day after each game. Update the risk register: did the Low-confidence call stay low, or did the game confirm it? A weekly tracking cadence closes the feedback loop and makes the next scout faster.
Adoption checklist and next steps
Use this checklist to start the workflow this week:
- Pick your templates (one-page card, 3-clip playlist, timeout script).
- Assign step ownership (who tags, who analyzes, who writes the card).
- Run a trial on your next opponent using one player only.
- Collect feedback from your staff after the game.
- Refine time budgets based on actual time spent.
- Iterate: add one player per week until the full rotation is covered.
Scaling tips: Split coverage by role — one assistant owns guards, another owns bigs. Use a shared Notion or Google Drive folder so all staff access the same card. For multi-assistant staffs, the opponent scouting checklist keeps everyone on the same step at the same time.
First-90-day plan: Weeks 1–3, run the workflow on one player per opponent. Weeks 4–8, expand to full rotation. Weeks 9–12, add the risk register and cross-check step. Pitfalls to avoid on day one: skipping the objective-setting step, writing reports longer than one page, and treating single-game clips as confirmed tendencies.
Key Takeaways
A repeatable step-by-step scouting workflow produces a one-page scout card, a 3-clip playlist, and a timeout script — and cuts per-player prep time from 60–90 minutes to 15–25 minutes when tagging tools are in place.
| Point | Details |
|---|---|
| Objectives first | Define three scouting questions before watching film to prevent passive, unfocused viewing. |
| One-page card rule | A scouting report must be readable in under 90 seconds — 6 fields per player, no more. |
| Label uncertainty | Use Low / Moderate / High confidence on every observation; require two independent clips before upgrading. |
| Use tagging tools | Automated tagging cuts per-player prep from 60–90 minutes to 15–25 minutes — the biggest time saver in the workflow. |
| Hoop Mentality resources | The Opponent Scouting Checklist, Scouting Report Template, and Scouting Bundle map directly to each workflow step for immediate adoption. |
What coaches get wrong about scouting reports
Most coaches spend too much time on the report and not enough on the decision it forces. A 12-page scout is not more useful than a one-page card. It is less useful, because no assistant can find the key call in a timeout.
The workflow above is built around one principle: good reports force a concrete output — a role fit, an explicit risk label, or a tactical recommendation. If your report ends with notes and no call, it is not finished. The timeout script is the test. If you cannot write a 20-second verbatim script from your scout, the report has not done its job.
Busy multi-game weeks are where this discipline matters most. Cut the player count before you cut the structure. Four players scouted properly beats eight players scouted loosely. Keep the one-page format, keep the risk labels, and keep the timeout script — those three elements are non-negotiable regardless of staff size or schedule.
Hoop Mentality has the templates to get started now
Hoop Mentality builds basketball coaching resources from real coaching experience. Three products map directly to this workflow.
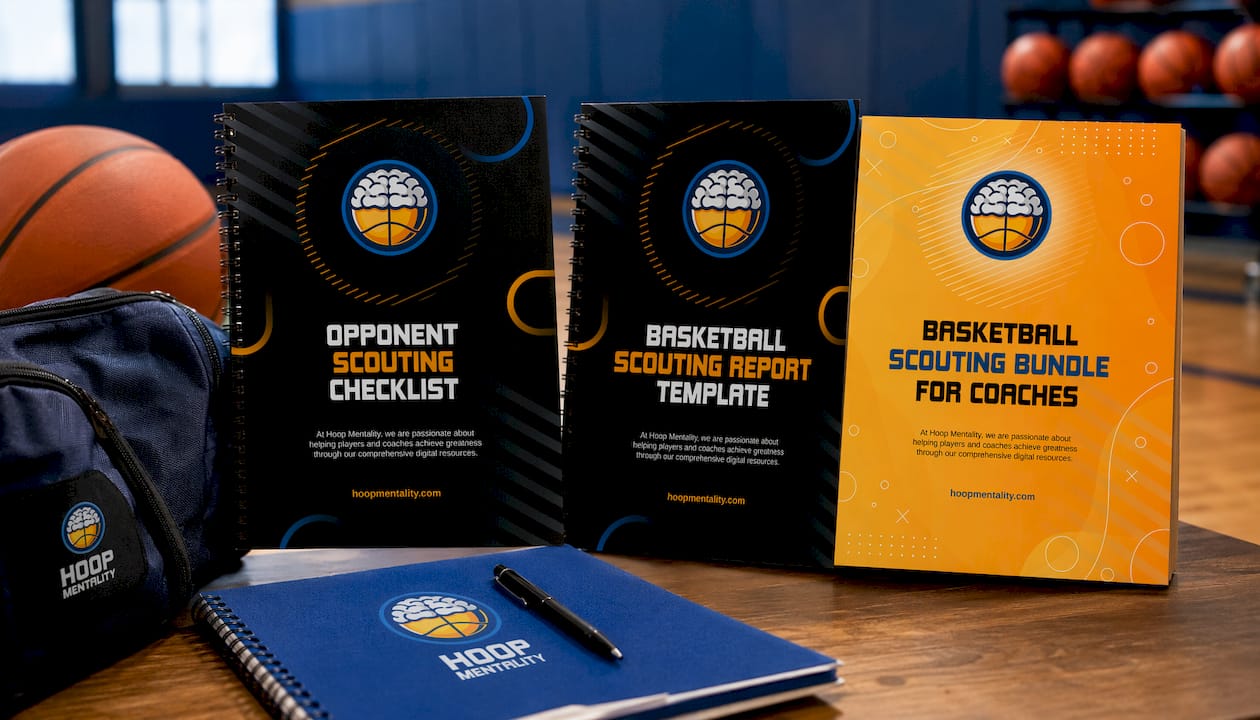
The Opponent Scouting Checklist For Coaches covers the prepare and deliver steps — use it to assign roles and confirm every field is complete before game day. The Basketball Scouting Report Template is the one-page card, pre-formatted with 6 fields per player and ready for Google Docs or Notion. The Basketball Scouting Bundle For Coaches combines both with additional scout cards and example reports — the right starting point for staffs scaling the workflow across multiple assistants.
Download the template, run a trial on your next opponent, and have a timeout-ready card before tip-off.
Useful sources and tools to explore next
- HoopBrief: How to Write a Basketball Scouting Report — Core methodology for the one-page card, time budgets, and the 6-field structure. Start here.
- msinanpala: Complete Guide to Football Scouting — Best source on objective-setting, risk registers, and avoiding confirmation bias. Maps to the prepare and follow-up steps.
- Basketball.com.au: How to Scout a Basketball Player — Step-by-step multi-source scouting framework; useful for validating film findings with live observation and statistics.
- Hoop Mentality Blog — Workflow guides, checklist breakdowns, and tool lists for coaches at every level.
- FCOPS: Reporting Dashboards in Clubs — Practical guidance on designing one-screen reports that work under pressure.
Reminder: Always cross-check single-game clips against at least one additional game before upgrading a Low-confidence observation. Update the risk register after every game, not just before the next opponent.
FAQ
What is a step-by-step scouting workflow for basketball?
A step-by-step scouting workflow runs prepare → collect/tag → analyze → synthesize → deliver → follow-up, producing a one-page scout card and a 3-clip playlist before each game.
How long does the full scouting process take per opponent?
With tagging tools, expect 15–25 minutes per player for tagging and 15–25 minutes for analysis. Without tools, tagging alone runs 60–90 minutes per player.
What goes on a timeout-ready scouting report?
Six fields per rotation player — dominant hand, preferred spots, primary action, defensive matchup, foul rate, and quiet edge — plus a one-line coach action call. The full card must be readable in under 90 seconds.
How do you avoid overconfidence from single-game film?
Label every observation Low, Moderate, or High confidence, and require at least two independent clips before upgrading from Low to Moderate. Record the risk type alongside each player field.
Where can coaches get ready-to-use scouting templates?
Hoop Mentality offers the Opponent Scouting Checklist For Coaches, the Basketball Scouting Report Template, and the Basketball Scouting Bundle For Coaches — each mapped to a specific step in the workflow.