

Run cuts in week one, screens in week two, relocation in week three, and spacing in week four. That sequence builds off-ball movement in the order players actually absorb it. If you only have time to fix one habit, fix relocation after the pass. It’s the cheapest rep to teach and the fastest to show up in games, and this plan gives you the drills, reps, and a full practice session to install all four in a month.
TL;DR:
- Teaching relocation immediately after passing is crucial because it is the most cost-effective and quickest habit to show improvements in games.
- Drills should emphasize recognition and timing, with at least 20 repetitions per screen type across two sessions to develop proper angles and contact.
- Making relocation the automatic response after passes significantly boosts offensive spacing and can produce visible results within a few weeks.
- Integrating offensive and defensive movement drills enhances overall team awareness and prevents gaps between play and coverage in games.
- Using film pauses and repetition with feedback improves off-ball decision-making and helps players recognize triggers faster under fatigue.
Table of Contents
- Movement Off the Ball Soccer Drills? What Basketball Coaches Actually Need
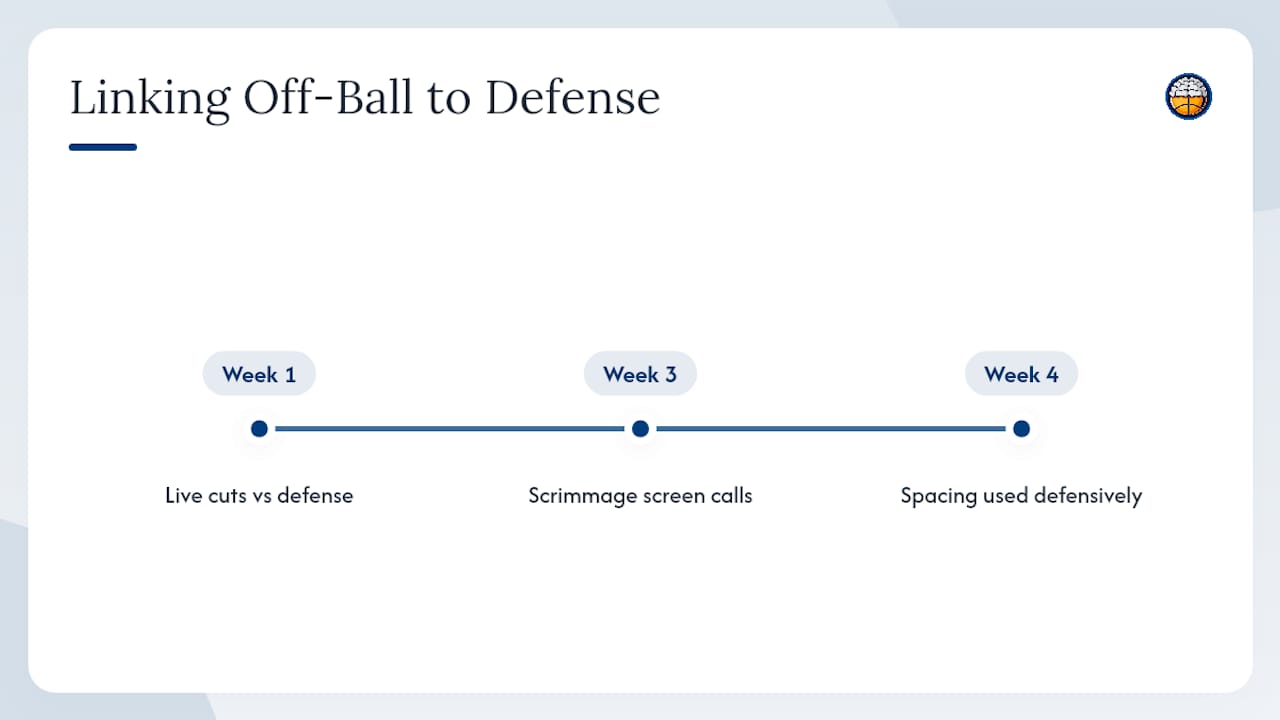
- Week 1: Teaching Baseline, 45-Degree, and Backdoor Cuts
- Week 2: Building Screen Timing on Pin-Downs, Flares, Ball Screens, and Back Screens
- Week 3: Making Relocation the Automatic Response to Every Pass
- Week 4: Locking In Spacing for Pick-and-Rolls, Post-Ups, and Transition
- The 60-to-75-Minute Practice Session That Ties It All Together
- Coaching Cues That Turn Drills Into Game Habits
- Role-Specific Drills for Forwards, Guards, and Post Players
- Common Mistakes Coaches Make Teaching Off-Ball Movement
- Connecting Off-Ball Movement to Team Defense
- Why Anticipation Beats Athleticism in Off-Ball Situations
- How Video Analysis Sharpens Off-Ball Decision Making
- Dejan’s Take on Building This Into Your Program
- Hoop Mentality Drill Packs Built for This Exact Progression
- Sources
- FAQ
Movement Off the Ball Soccer Drills? What Basketball Coaches Actually Need
If you searched “movement off the ball soccer drills” looking for basketball content, you’re in the right place. The correct term for what you’re teaching is off-ball movement training, and it covers timing, recognition, and relocation, the three skills that let a player without the ball create advantages for the team. Coaches who search using soccer-adjacent phrasing usually mean the same core idea soccer coaches teach their attackers: move with purpose, not just motion.
Three principles carry the whole system.
- Timing means moving at the exact moment a defender is vulnerable, not a beat before or after.
- Recognition means reading the ball handler’s body language and the defense’s reaction before deciding to cut, screen, or relocate.
- Relocation means never standing still after you pass, because a stationary body is easy to guard and closes passing lanes.
Off-ball movement consists of these three components, and coaches should train players to read the ball handler’s advantage, whether that’s a drive, a middle attack, or a denial, then move to exploit it. A player who cuts on a predictable count instead of reading the defender will get stopped by any team that scouts him for five minutes.
Watch for three things during every drill: where the player’s eyes are pointed before the move, how quick the first step is once the trigger appears, and whether the final position actually improves the offense. A cut that ends in a spot no better than the starting point is wasted movement, even if the mechanics looked clean. Active off-ball movement creates open shots and breaks down defenses even when the mover never touches the ball again, which is the argument to use on any player who thinks screening for a teammate is a waste of energy. For a deeper walkthrough of these mechanics, Hoop Mentality’s guide on off-ball movement principles covers the coaching language worth borrowing for your own practice plan.
Week 1: Teaching Baseline, 45-Degree, and Backdoor Cuts
Cutting comes first because it’s the simplest trigger-response pattern to teach and it forces players to practice reading defenders before you add the complexity of a screener.
- Film and shadow warm-up (10 to 15 minutes). Pause game or practice film at the moment a cut should trigger, ask players to call out the cut, then have them shadow the movement without a ball. This builds recognition before you ask for speed.
- Two-line cutter drill (3 sets of 8 to 12 reps per cut type). One line passes, one line cuts baseline, 45 degrees, or backdoor against a passive defender who gives a consistent look each rep.
- Live progression. Once players hit a strong success rate against the passive look, add a live defender who mixes denial and overplay, then finish with a catch-and-finish move at game speed.
Track mastery with a simple number: run 30 live reps and count how many end in a clean catch on target.
Pro Tip: Have cutters call out the trigger out loud before they move (“he’s turning his head” or “she’s driving middle”). Speaking the read-out loud forces recognition instead of memorized counts, and it exposes which players are guessing.
Week 2: Building Screen Timing on Pin-Downs, Flares, Ball Screens, and Back Screens
Screens fail for one of two reasons: bad angles or bad timing. Isolate both before you ever run a live possession.
Start with a screen fundamentals drill, 20 repetitions of each screen type (pin-down, flare, ball screen, back screen), grading stance, angle, and legal contact on every rep. Twenty reps per screen type across two dedicated weekly sessions is enough volume to build the pattern without burning out the legs.
- Progress cutters through three stages: no defender, passive defender, live defender, at 3 sets of 12 reps per stage.
- Coach the communication piece directly: screeners call the cutter’s name or make eye contact before setting, and cutters confirm with a head nod or a verbal “screen.”
- Teach cutters where to stand immediately after using the screen, since a good screen wasted by standing still after the catch defeats the purpose.
- Force screen usage into scrimmage by awarding bonus points for a possession that scores off a called screen action.
Drills that simulate curl, fade, and straight cuts off varied screen angles sharpen the cutter’s finishing decisions under different defensive reactions, which is exactly the skill that separates a good screen from a wasted one.
Pro Tip: Assign a partner grade to every screening rep, a simple thumbs up or down on angle and contact. Grading forces quality, and it’s how you catch a screener drifting into an illegal moving screen before it becomes a habit.
Week 3: Making Relocation the Automatic Response to Every Pass
By week three, players know how to cut and screen. The gap most teams never close is what happens the instant after they pass, and that gap is exactly where the fastest gains show up.
- No-standing rule drill (3 rounds of 3 minutes at a station). Every pass must be followed by a prescribed relocation move: fill the corner, lift to the wing, or drift to the top. Any player caught standing after a pass restarts the round.
- Relocation ladder (corner to wing to top). Players move through all three spots on a timed cue, training the habit of continuous motion rather than one-and-done relocation.
- Decision training: hold or continue. Once the ladder feels automatic, add a defender and teach players to read whether their new spot actually opened a passing lane. If it did, hold. If the defender recovered, keep moving.
Relocation after a pass is the highest-leverage off-ball habit a team can teach, and it produces visible improvement within a few weeks of deliberate reps, even though full trust from teammates in game situations tends to build over eight to twelve weeks.
Week 4: Locking In Spacing for Pick-and-Rolls, Post-Ups, and Transition
Spacing is where all three earlier weeks either pay off or fall apart under pressure. A team that cuts and screens well but bunches into the same fifteen feet of floor is still an easy team to guard.
- Build a spacing map for your core actions, marking exactly where the weak-side corner, weak-side wing, and strong-side shooter should stand during a pick-and-roll, a post-up, and a transition fill.
- Run a spacing review drill using paused video: stop the tape the instant an action starts and score each player’s positioning against the map.
- Set a clear target. Pausing scrimmage film to score spacing accuracy and pushing toward 90% correct positioning by the end of a four-week cycle gives you a number every player can chase.
- Enforce spacing rules live in scrimmage by resetting any possession where two players occupy the same zone.
The 60-to-75-Minute Practice Session That Ties It All Together
Here’s a session structure you can run in any of the four weeks, adjusting the drill content to that week’s focus.
- Warm-up and film triggers (10 minutes). Ball handling, then a short film clip showing the week’s trigger.
- Station rotations (25 to 30 minutes). Three stations, cutting, screening, relocation or spacing depending on the week, with players rotating every 8 to 10 minutes.
- Live integration period (15 to 20 minutes). Small-sided scrimmage where the coach calls out the week’s focus and rewards possessions that execute it.
- Cooldown and mastery check (5 to 10 minutes). Quick review of the rep count or accuracy number from that day’s stations.
Assign one assistant coach or a trusted player to each station so rotations happen without dead time. Track a simple weekly checklist:
- Week 1: cut success rate against live defense
- Week 2: screen angle grade average
- Week 3: relocation compliance in scrimmage
- Week 4: spacing accuracy percentage
A progressive approach that adds one habit per week helps players retain each skill before the next one stacks on top, instead of drowning them in every concept during week one.
Coaching Cues That Turn Drills Into Game Habits
Short, repeatable language beats long explanations, especially with younger players who need one instruction to process mid-possession.
- Cutters: “Sell baseline, then explode.” Sell the fake direction before the real cut.
- Screeners: “Shoulder, plant, call.” Set the angle, plant the base, and communicate the screen out loud.
- Relocators: “Pass, go.” No standing after the ball leaves your hands.
Run every skill through the same progression ladder: no defender, then passive, then live, then full game speed. Skipping a stage is the number one reason drills that look great in practice fall apart in games.
Measure mastery with three numbers your team can track weekly: rep accuracy against a live defender, percentage of possessions with correct spacing, and how often the trained action actually gets used in scrimmage without prompting. Hoop Mentality’s off-ball movement tips offer a shorter cue list worth posting in the gym.
Role-Specific Drills for Forwards, Guards, and Post Players
Off-ball movement isn’t one-size-fits-all. A post player and a shooting guard need different reps even inside the same four-week plan.
Forwards and wing players benefit most from the 45-degree cut and flare screen combination, since their game usually lives in catch-and-shoot or catch-and-attack situations from the perimeter. Run their reps with a shot or a one-dribble attack finish attached, never a plain catch, because that’s what they’ll face in games.
Guards need heavier reps on relocation and backdoor cuts, since they handle the ball more and get denied more often on the perimeter. Their drill sets should emphasize reading ball-handler pressure and cutting the instant a defender overplays for a steal attempt.
Post players get the most value from pin-down and back screen work, plus relocation from the short corner to the opposite block. Because post players move less frequently than perimeter players, their no-standing rule reps should be shorter and more frequent, three separate one-minute bursts instead of one long station, to build the habit without gassing them.
Defenders working on team defense drills should mirror the same movement patterns from the help side, since anticipating where an offensive player will relocate is the flip side of teaching relocation in the first place. Running both sides of the same action in the same practice reinforces the read for everyone on the floor.
Common Mistakes Coaches Make Teaching Off-Ball Movement
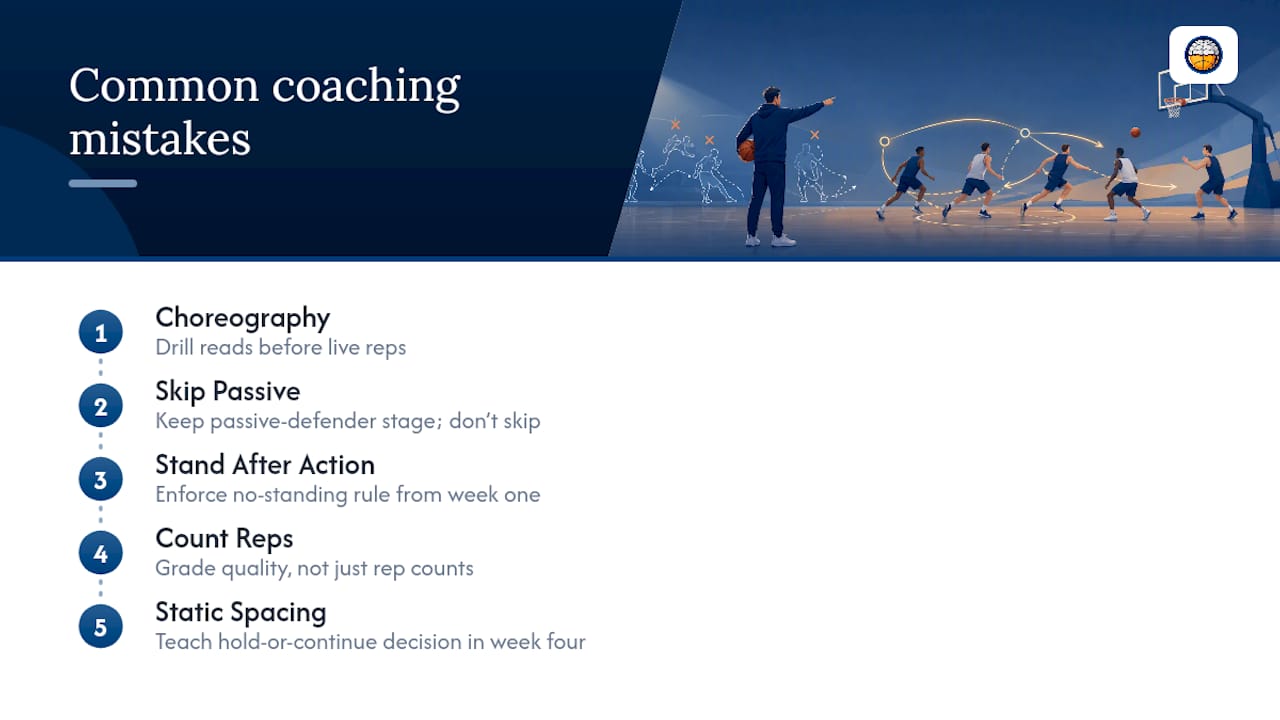
The most common error is teaching cuts and screens as pure choreography, a fixed count or a memorized pattern, instead of a read. Players who memorize sequences look sharp in a script but freeze the moment a defense does something unexpected. Fix this by drilling recognition first, using the film-and-shadow warm-up before any live rep, every single week.
The second mistake is skipping straight to live defense. Coaches under time pressure often cut the passive-defender stage to save minutes, and players end up practicing failure instead of building the pattern. Hold the line on the progression ladder even when practice time is tight; trim a station instead of skipping a stage.
The third mistake is ignoring the moment right after a good cut or screen. Players execute the action, then stand and admire it. Enforce the no-standing rule from week one on, not just during week three, so it becomes reflexive rather than a late addition.
The fourth mistake is grading volume instead of quality. Twenty sloppy screen reps teach twenty bad habits. Add partner or coach grading to every rep set, checking angle and contact rather than just counting completions, since quality grading accelerates learning far more than raw rep count alone.
The fifth mistake is treating spacing as a static diagram instead of a moving target. Players hold their spacing map position even after the defense adjusts. Teach the hold-or-continue decision explicitly in week four so spacing stays alive rather than frozen.
Connecting Off-Ball Movement to Team Defense
Off-ball movement and defensive positioning are two sides of the same coin, and treating them separately wastes practice time. Every cut, screen, and relocation your offense drills is also the exact action your defense will face from an opponent, so run both perspectives in the same session whenever possible.
When you drill cutters against a live defender in week one, use that same rep to teach the defender proper denial positioning and how to fight through contact on a screen. The offensive player learns to read pressure; the defender learns to apply it correctly. Splitting these into separate practices doubles your time cost for no extra benefit.
Extend this into scrimmage rules. When you enforce the no-standing rule for offense in week three, add a matching defensive rule: defenders must communicate screen calls to teammates the instant they see one coming. This forces both sides of the ball to treat off-ball habits as a live, reactive skill instead of a scripted one.
Spacing works the same way. The spacing map you build in week four for your offense is also the map your defense should use to identify where help is likely to come from and where gaps will open. A defender who understands why an offensive player relocated to the corner will close out faster than one who’s only ever drilled help-side rotations in isolation.
Coaches who run offense and defense as fully separate units in practice tend to see the disconnect show up in games, when players who look sharp in shooting drills freeze the first time a live defender takes away their first option. Integrating the two from week one prevents that gap from ever forming.
Why Anticipation Beats Athleticism in Off-Ball Situations
The single skill most players lack isn’t speed or footwork. It’s reading the ball handler to identify the correct moment to move, and that’s a decision-making skill, not a physical one. Coaches who chase athleticism first and recognition second are training the wrong priority.
Anticipation develops through repetition of the same visual cues, not through generic reaction drills. A player who has seen a help defender’s head turn a hundred times in film sessions will recognize it in a live game half a second faster than a player who’s only heard the concept described verbally. That half second is the entire difference between an open catch and a contested one.
Decision-making under fatigue is a separate skill from decision-making fresh, and most practices only test the fresh version. Build a few live reps into the tail end of practice, after conditioning or scrimmage, specifically to see whether players still make the correct read when tired. Cutters who nail the trigger in the first ten minutes of practice but blow it in minute fifty are showing you a conditioning gap disguised as a decision-making gap.
Confidence also plays a role that’s easy to underrate. A player who’s been burned trying a backdoor cut and getting it wrong twice will hesitate on the third opportunity even if the read is correct. Coaches should track not just whether a player made the right read, but whether hesitation delayed the action past the point it was useful. Praising a correct but late read the same way you’d praise a correct and prompt one teaches the wrong lesson.
How Video Analysis Sharpens Off-Ball Decision Making
Film study isn’t a supplement to these drills, it’s part of the drill itself. Pausing tape at the exact moment a trigger appears and asking players to identify it out loud trains recognition faster than any number of unopposed reps, because it isolates the mental read from the physical execution.
Use paused possession review specifically for spacing, scoring each player’s position against your spacing map every time an action starts. This turns an abstract concept into a number the player can see improve week over week, which matters more for buy-in than any verbal explanation of “good spacing.”
Cut the film sessions short and specific. Ten to fifteen minutes of targeted clips beats a full-game breakdown, since players retain sharp, repeated exposure to the same two or three trigger types better than a broad tour through every possession of a game. Build a small clip library organized by trigger type, ball-handler drive, help defender rotation, denial pressure, so you can pull the exact five clips a struggling player needs without hunting through full-game footage mid-practice.
Pair video with the live drill immediately afterward whenever the schedule allows it. Watching the trigger, then executing the response live within the same session, closes the loop between recognition and action far better than watching film on Monday and drilling the response on Wednesday.
Dejan’s Take on Building This Into Your Program
The four-week order in this plan isn’t arbitrary. Cuts before screens before relocation before spacing follows how the skills actually stack, each one depends on the last being reasonably solid. Hoop Mentality builds its playbooks and drill packs around that same layered logic, so coaches running this progression can pull matching resources for each week rather than building sessions from scratch. Credentials and program results specific to Dejan’s coaching background will be added here by the publisher.
— Dejan
Hoop Mentality Drill Packs Built for This Exact Progression
Running four weeks of new drills from a blank notebook eats into the time you’d rather spend coaching. Hoop Mentality’s drill packs are built to slot directly into the plan above instead of replacing it with something generic.
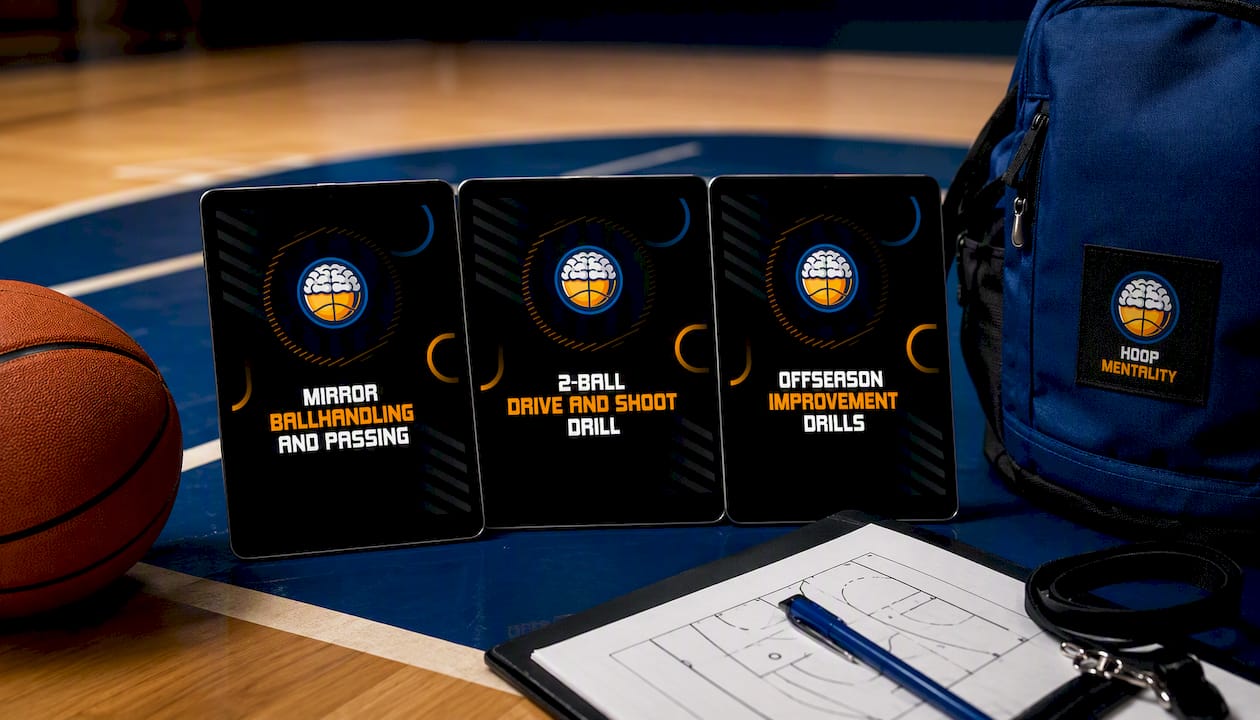
The Mirror Ballhandling And Passing Drill pairs naturally with weeks one through three, since sharp passing timing is what makes cuts and relocation actually work in live reps. For week four’s finishing work off relocation, the 2-Ball Drive And Shoot Drill gives players a way to finish live reps at game speed once the read is automatic. If you’d rather cover the entire four weeks with one purchase, the Basketball Offseason Improvement Drills bundle is built for exactly this kind of multi-week skill build, so you’re not stitching together five separate resources to cover one progression.
Drop any of these straight into the station rotation described in the sample practice above, no rebuilding required. Preview the product pages to see the full rep breakdowns and sample pages before you commit a practice plan to them.
Sources
- How to Become a Better Off-Ball Player | HoopBrief
- Off-Ball Movement in Basketball: The Missing Skill
- The Importance of Off-Ball Movement and How to Get Open — GW Hoops
FAQ
How Long Does It Take to See Off-Ball Movement Improve?
Deliberate practice using a four-week progression produces measurable gains within a few weeks, though full teammate trust in game reads tends to build over several weeks.
What’s the Most Important Off-Ball Habit to Teach First?
Relocation after a pass is a high-leverage habit, since it is relatively easy to teach and tends to show up quickly in games.
How Many Reps Should Players Run Per Screen Type?
Run sufficient reps per screen type, spread across multiple screening sessions, before adding a live defender.
Do Hoop Mentality’s Drill Packs Cover This Full Progression?
Yes. Some drill bundles are designed to support multi-week skill programs and may cover the full progression described.